


Looking for help?
Find answers to your questions
- Different types of night vision and distinctions within color night vision
- Why does the system sometimes miss events?
- How to choose security camera system, wired or wireless?
- What Affects the Accuracy of Motion Detectoin?
- What is Auto-tracking?
- How to set camera light mode on NVR and WallPixel App?
- How to remove the hard drive from Yeewise NVR built-in monitor?
- How to install hard drive for Yeewise NVR built-in monitor?
- How to adjust PIR sensor angle?
- How to Access Yeewise Cameras/NVRs via Web Browsers
- How to add your Yeewise security camera system to the WallPixel mobile app?
- How to view Yeewise cameras on your phone?
- How to view your Yeewise cameras on Windows computer?
- Mac OS Sierra Gatekeeper stops me from installing Mac EseeCloud App. What should I do?
- How to view your Yeewise Cameras on Mac?
- How to set up the pan tilt solar camera to work standalone on WallPixel app?
- How to set a closer camera as a WiFi repeater for a camera that is out of WiFi range?
- How to pair a camera to your Yeewise NVR?
- How to use camera with Ethernet cable hard wire?
- How to Configure PIR Settings on Yeewise NVR?
- How to Set up PIR Schedule via WallPixel App?
- How to set up Yeewise PTZ WiFi camera system?
- How to set up Yeewise WiFi camera system with monitor?
- How to set up Yeewise solar camera system?
- How to Setup Yeewise Plug-in WiFi Camera?
How to use camera with Ethernet cable hard wire?
You may have a camera that is too far, or with too many obstacles to reach the NVR through WiFi. In such situations, you can choose to hardwire the camera.
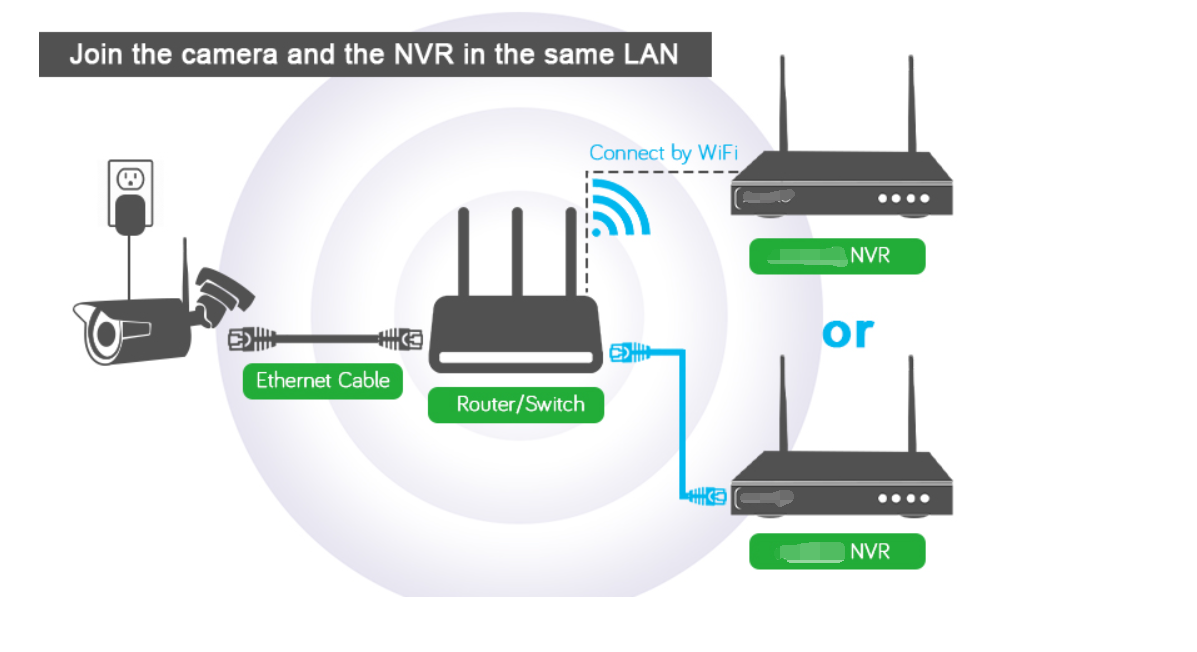
To do so, the key is: join both the camera and NVR into the same LAN network.
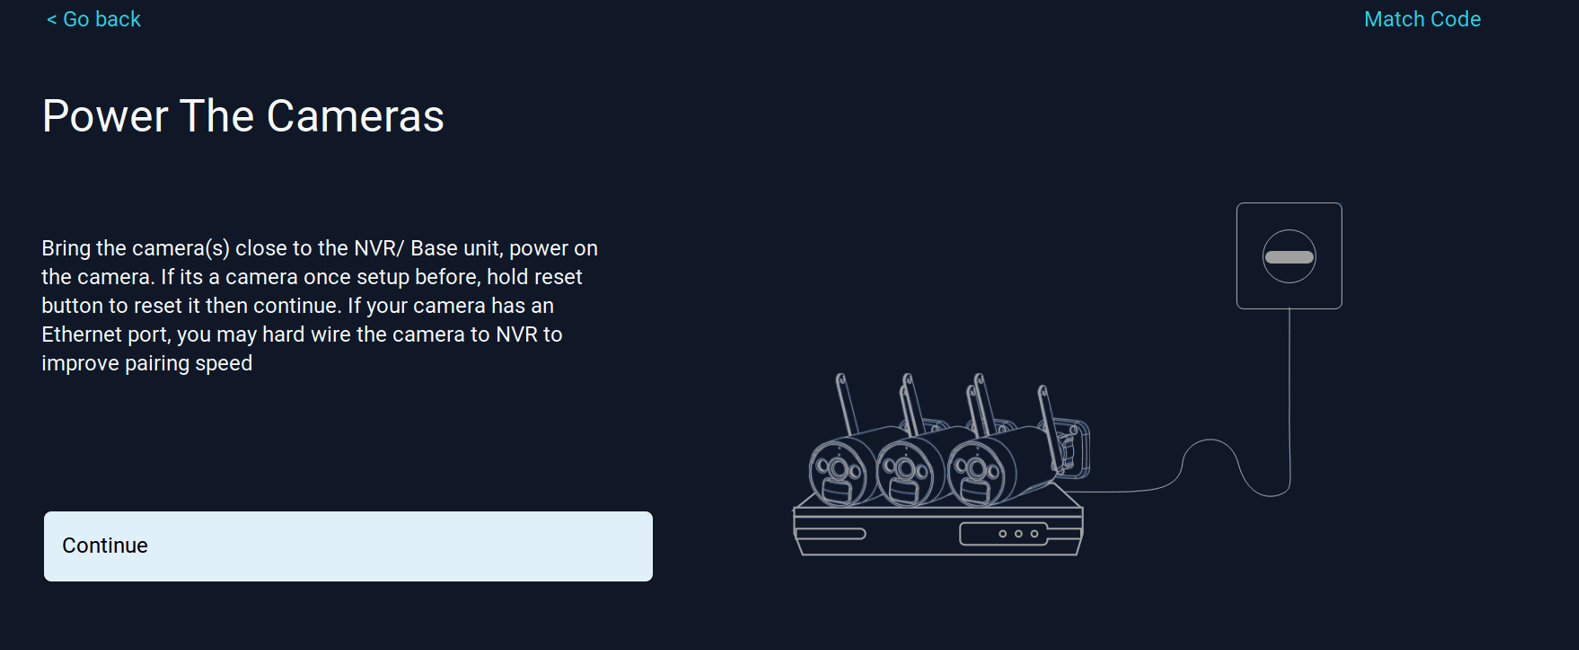
1. Plug the camera to power with included power plug.
2. Use a standard CAT5/ CAT6 Ethernet cable to hardwire the camera to your router, or to a switch in your LAN network. (camera joins the LAN)
3. Connect your NVR to your home network. This should have already been done if you've connected your NVR for Internet access. Yeewise NVRs can connect to your WiFi wirelessly. Or you can also hard wire the NVR to your router/ switch. (NVR joins the LAN)
Now, the camera and the NVR are in the same LAN network. They can recognize each other.
Below is a diagram showing you the connection map,

4. Add the camera to an NVR channel.
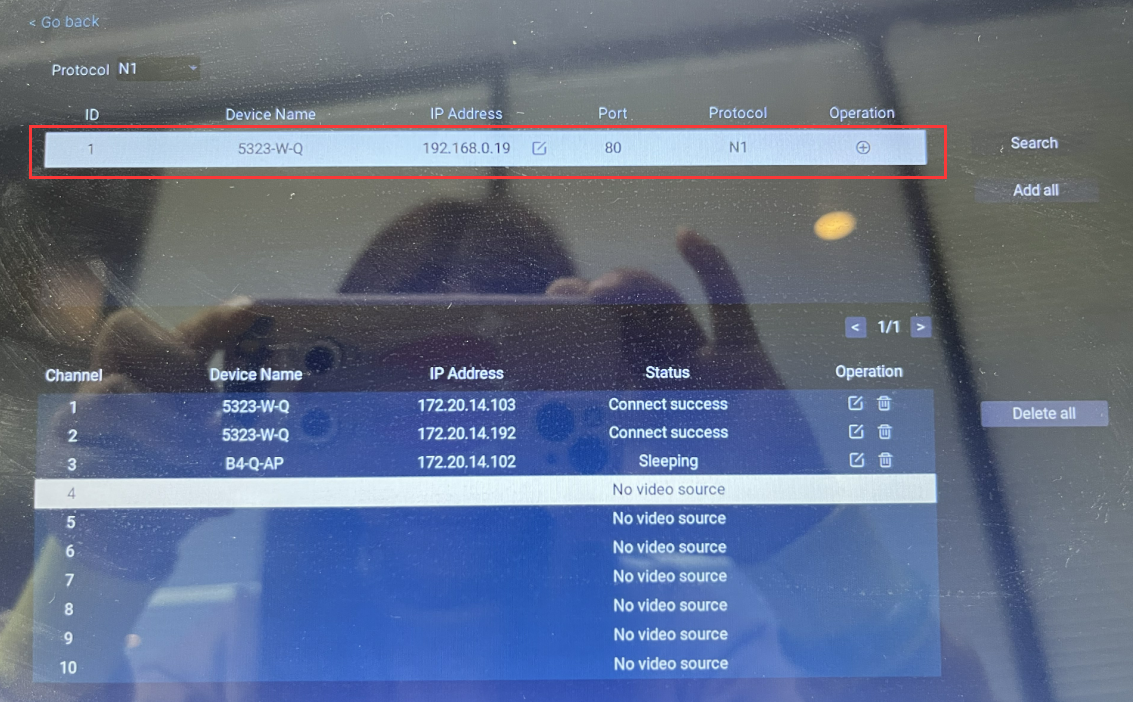
a) On the NVR screen, click + icon at the bottom, then click Match Code on top right corner.
b) Refresh till you see the camera listed in above box with IP 192.168...(192 IP means the camera is connected through the cable). Click to select an empty channel from the bottom box, and then double click the camera to add it. (If you are changing a camera from WiFi to Ethernet, you need to delete that channel from below box to get an empty channel.)
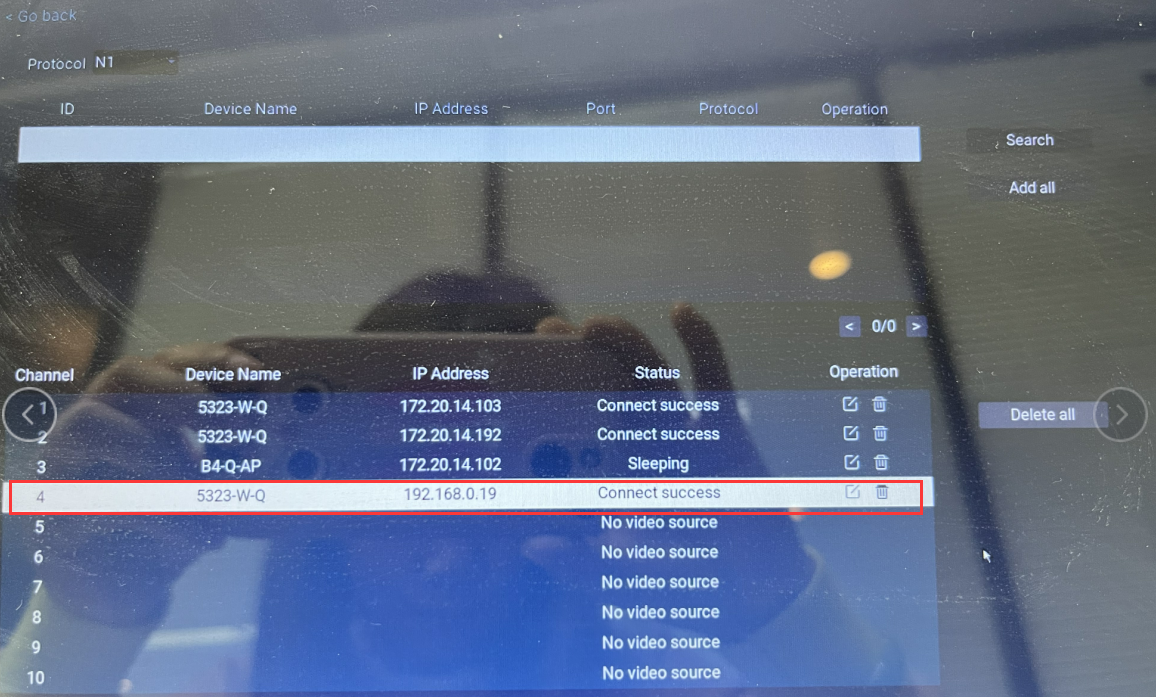
The camera's IP remains to be 192.168...now, your camera is streaming and working through the Ethernet cable. You can go ahead to mount your camera.
Updated on 05 Jul 2023